Zedmed Office uses templates for letters, labels and reports. A standard set of templates is included with Zedmed, and you can also create your own. For Zedmed on-prem customers, the Microsoft Word FRM editor is used to create and edit templates. If you are a Zedmed Cloud customer, use the RTF Internal Editor guide.
Create custom FRM templates
Zedmed includes a set of standard templates, and you can edit these templates to create custom versions. For letters, forms and the mail merge templates used by some reports, the process is explained below. For labels, the same process applies but the mail merge steps are different and explained in the next section.
Note: These steps change an existing template. They do not make a copy of a template or change its name. This is because Zedmed looks for specific templates by name to apply them. You can copy a Zedmed template in Windows, rename the original, and give the new template the name used by Zedmed, but this is often unnecessary and can overcomplicate the process.
To customise a template:
- Go to Zedmed's Management tab.
- Select WP Setup > FRM Documents.
- Select the template tab required:
- Letters - to be used with the Office letter writer.
- Mail Merge Documents - to format Office reports.
- Labels - to print patient and appointment labels.
- Forms - to print out patient details.
- Select an existing document to use as a template.
- Select Open.
Microsoft Word will start.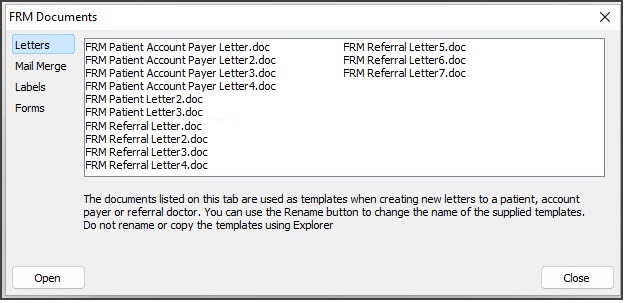
- Select Yes to the warning prompt to run the SQL command.
- Select Link data source then the link dialog opens.
Browse to find and select the data source template for the FRM template you are copying. Data source templates are Word documents with the mail merge functions used by the FRM template.
For example, if you opened "FRM Referral Letter 2", you would locate and select "DS Referral Letter 2".
FRM templates and DS documents are both stored in the C:\Zedmed\Document and C:\Zedmed\Label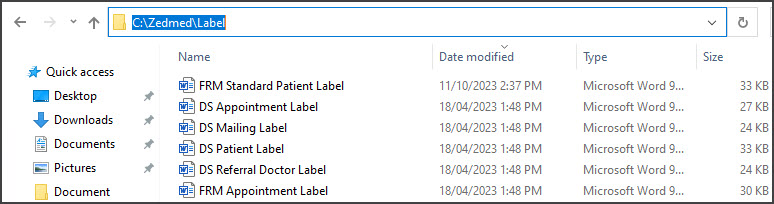 After you link the DS template, the FRM template will open in Microsoft Word.
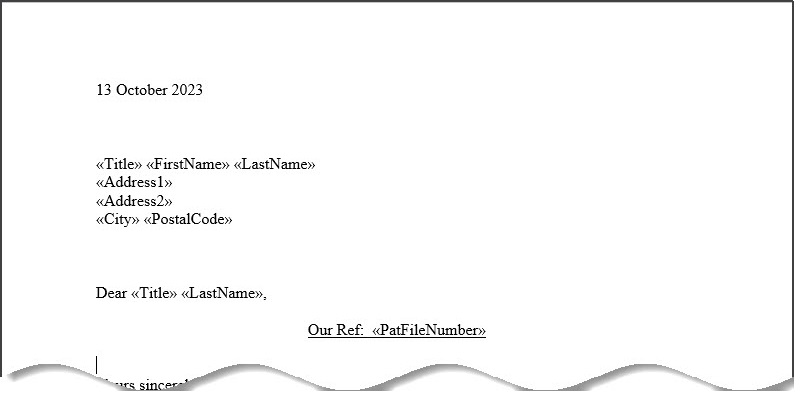
- Make the required changes to the template.
To make Mail Merge changes for labels, see Label mail merge. - To make Mail Merge changes for letters and reports:
- Check that Use the current document is selected for Mail Merge.
- Select the Mailings ribbon.
- Select Start Mail Merge > Step-by-Step Mail Merge Wizard.
- Follow the wizard to make the changes required.
- When you have finished, save the updated templates.
- Test that the template reflects the intended changes.
For example, if you updated a template to add text to a letter, use the Letter writer to confirm the new text appears.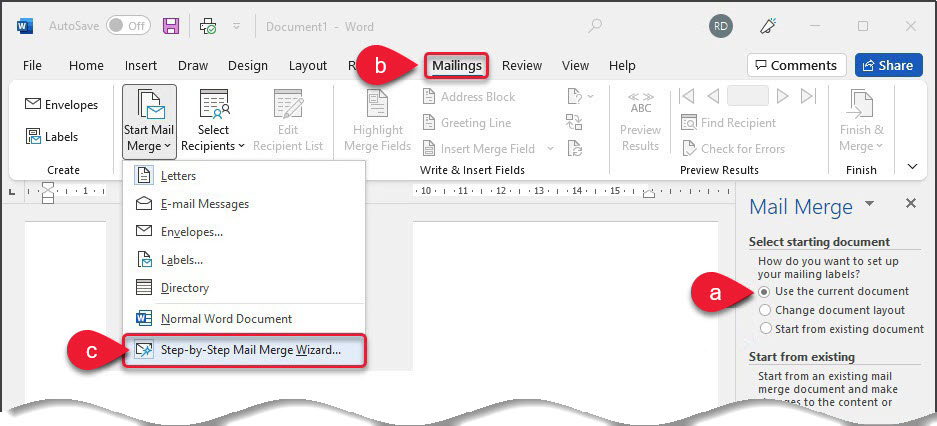

 After you link the DS template, the FRM template will open in Microsoft Word.

Mail Merge for FRM label templates
When creating a custom label:
- Follow the steps 1 to 6 in the section above.
These steps will open the label template in Word. - Press CTRL & A on your keyboard to highlight the template and copy it so you don’t lose it when the label type is changed.
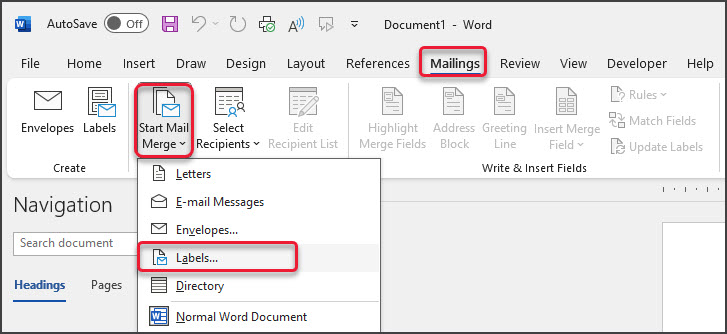
- Select Mailings > Start Mail Merge > Labels.
- If you use a label printer like a Dymo, tick the Continuous Feed Printers option.
- If you print a sheet of labels through a standard printer, select Page Printers then select the appropriate tray.
- To set the Label information, you will need the label’s international code or product number.
This is normally found somewhere on the sheet or the label box. - Select OK once complete.
- When you close out, you'll get the following popup:

- If you have copied the template earlier, click OK.
- If you didn't copy the template earlier, select Cancel, then copy everything & go back to the Label settings.
The original label template will get deleted out. - Right-click in the box & select Text Direction
- Select the horizontal option then click Ok.
- Right-click in the box again and from the Paste options, select Keep Source Formatting.
- Make any adjustments required.
Merge fields can be accessed from the same spot as the other templates; Mailings > Insert Merge Field. - When complete, select Close and Yes to save.


Note: If the Label templates are renamed they will not print. Zedmed looks for specific template names like "FRM Standard Patient Label.doc" when you select a template from the print menu.