Finish an encounter and provide billing information for reception. When the patient has been billed, they will be removed from the Waiting Room.
After ending an encounter, you can admit the next patient and start a new encounter.
Ending an encounter
Once the consultation has finished, you can make notes, end the encounter and add billable items to the Billing Wizard.
To end an encounter:
- Complete the clinical notes.
- Select the Stop button.

- If the patient is registered with My Health Record, you will be prompted to create an Event Summary.
Selecting Yes will open the Event Summary form so you can review and, if required, deselect items.
Once you're happy with the information, select Next to view the final form, then select Confirm Content and Upload to upload the information to My Health Record. To learn more, see the Patient consent and Event Summary sections of the My Health Record Article. - The final step is the Billing Wizard, which is covered in the next section.

The Billing Wizard
Completing the Billing Wizard is an important part of the consultation. The wizard opens automatically if you admit the patient from the waiting room, and links the bill to the patient. You can also manually select the Billing Wizard from the History View, select Create an Attendance and complete the wizard.
Billing Wizard information:
- DOB indicates whether the patient is underage and should be bulk billed.
- HCC indicates whether the patient has a Healthcare Card number, which may be a practice requirement for bulk billing.
- Medicare Number indicates whether the patient's Medicare number is on record, which is required if the practice bulk bills.
- DVA tells you if the patient is covered by the Department of Veterans' Affairs.
- Previously billed lists the last three years of billed items for the patient by all doctors at the practice.
To complete the Billing Wizard:
- Choose the payer.
Use the Payer field if it's a patient, or make a note in Attendance notes if the payer is Medicare (Bulk Bill) or Private (patient pays and can apply for a rebate). - The Selected Items field shows the items to be billed.
To add additional items, select them from the list of Recent Items or use the Find Item icon by entering keywords or the item number. Double-click the search result to add the item. - To include an entry from the Special Instructions field, select the entry to move to the Selected Instructions field.
You can also select the entry to move it back. - If Bulk Billing
Follow your practice workflow for Bulk Billing consent, which can be performed by the practitioner or reception.
The Send Medicare Bulk Billing Consent button will SMS the patient a consent form. See the Bulk Bill Consent guide to learn more - Use the Attendance notes field to add any instructions for reception, such as "Book to see me in 2 weeks."
When performing a COVID-19 vaccination, use the Attendance Notes field to enter:
- If this is the 1st or 2nd dose.
- If the vaccination was performed out of hours.
- Select OK, and the information will go to reception.

Considerations
The reception will bill the patient from the Waiting Room.
The Doctor Assigned Billing Codes section lists the items added to the invoice when Add All is selected.
The Billing Instructions field shows important billing information, and the item number used must match the Billing Instructions. If the incorrect item number is shown, it should be changed.
E.g. If the item number is for dose 1 and the Billing Instructions say dose 2 was used, the item number should be updated.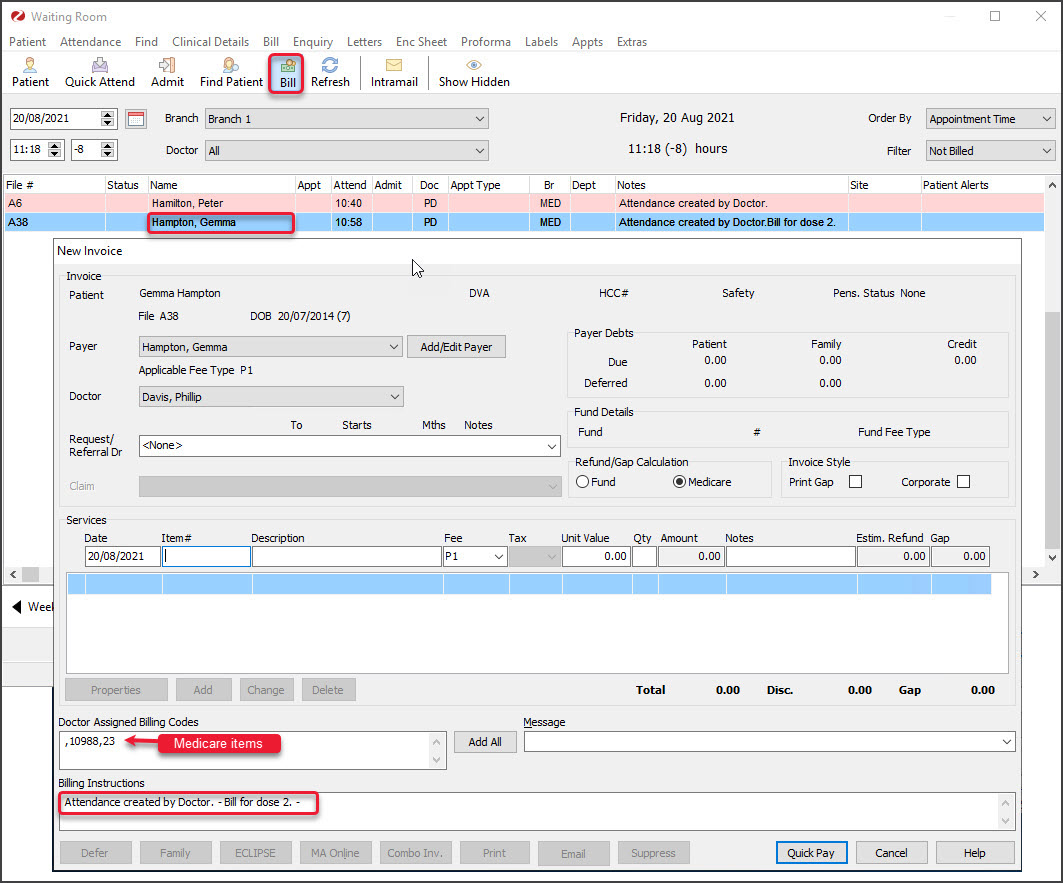


Deleting an encounter
It is possible to delete an encounter that has been ended by reopening the encounter on the same day. This may be required if multiple patients are open in Clinical Records and the encounter was started for the wrong patient.
To delete an encounter:
- Open the patient in Clinical Records.
For more information, see the Find a patient article. - Select the green play button in the History View to start the encounter.
- Select Yes when prompted to continue the previous encounter.
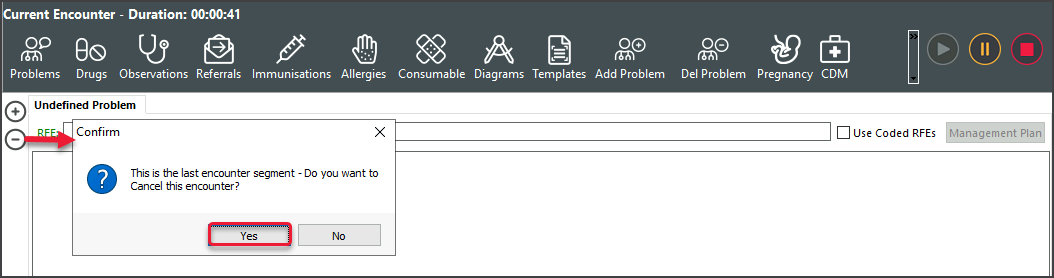
- Select the Delete Encounter Problem icon to the left of RFE.
- Select Yes to the prompt to cancel the encounter.
 The encounter will be removed, and the Current Encounter will close, taking you back to the History View.
 The encounter will be removed, and the Current Encounter will close, taking you back to the History View.