This guide explains how to install Zedmed's Cloud Middleware to facilitate secure messaging to and from Zedmed Cloud.
Installation Summary
Zedmed's Middleware installs to ProgramData, then autoruns the configuration exe file (with credentials) to add a 'results' and 'scans' folder to C:\ZedmedMiddleware for secure messaging providers to get outgoing files from. It will also add an ini file that can be edited to provide the Cloud Middleware with the locations of messaging providers that perform inbound communications.
Installation steps:
- Run the Zedmed Cloud Middleware installer ZedmedCloudFileService-v3.msi.
The installer can be downloaded from Zedmed's Client Portal. - Review and Accept the End-User License Agreement.
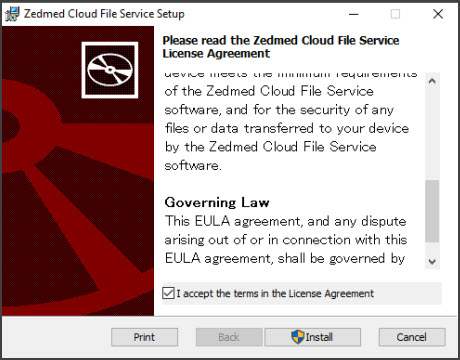
- Select Install.
- If required, respond to the user access control prompt to provide administrator rights.
The installer takes the following steps to install and register the middleware service:
- Copies the program files to the local computer. The default is 'C:\ProgramData\Zedmed Cloud\'.
- Registers the service with the operating system under the name Zedmed Cloud File Service.
- Sets the service to start automatically using the local system account, whenever the computer starts.
- Starts the service running in a waiting state, where no actions are taken until the configuration is completed.
- When the final screen, tick select Configure the Zedmed Cloud File Service now?
Below is the Zedmed Cloud File Service running in Windows.
- Select Finish.
This will open the configuration utility,, which is covered in the next section.


Cloud Middleware configuration
The configuration utility starts automatically from the installer. It can also be started manually by running C:\ProgramData\Zedmed Cloud\ZedmedCloudFileService.exe'
When the Cloud middleware has completed the installation, it will automatically run ZedmedCloudFileService.exe - the configuration utility.
When the configuration utility opens:
- Select Yes.
You will be prompted to select a folder. - Manually create a folder called C:\ZedmedMiddleware.
- Select C:\ZedmedMiddleware as the target directory
This will be used for the 'results' and 'scans' folders
• Scans - files in this directory are uploaded to the Zedmed Cloud Scans folder.
• Results - files in this directory are uploaded to the Zedmed Cloud Results inbox. 'Download’ directory in Zedmed.
If it is being installed on an old on-prem server, the results file should be c:\Zedmed\downloads
If it is being installed on a workstation for cloud customers, c:\Zedmedmiddleware\results (see screenshot below)
- When prompted, enter the username and password.
These credentials are provided by CIS for that client and stored in 1Password. - Select OK.
Note: Once entered, credentials can't be viewed. The client must store them securely. They may be needed in the future.

Messaging providers overview
Zedmed's Cloud Middleware can integrate with Healthlink, Medical Objects and Promedicus and manage sending files (Outbound - results and scans folder) and message acknowledgments (Inbound).
There can only be one Cloud Middleware instance per clinic. If more than one middleware service is set to handle outbound messaging the middleware instances will conflict with one another and messaging and acknowledgments will not work correctly. To prevent customers from accidentally configuring multiple secure messaging integrations, each integration must be enabled manually using the zedmedfileservice.ini file.
Screenshot of the ini file that Zedmed uses to specify the Inbound location for the chosen messaging provider.
Example from an on-prem server.