Create deferred invoices for patients and third parties and bill them at the end of each month. The invoices will not be treated as outstanding amounts until they are processed using the Print Deferred Bills feature.
Deferring an invoice
When an invoice is for a payer who is billed monthly, the invoice can be deferred. The payer could be the patient or a third party.
To defer an invoice:
- Follow the normal invoice creation process.
- Select the Defer button on the bottom left.
The invoice will close and be saved as a deferred invoice.
This will not count as a debt and will not appear as an outstanding amount in Zedmed's financial reports.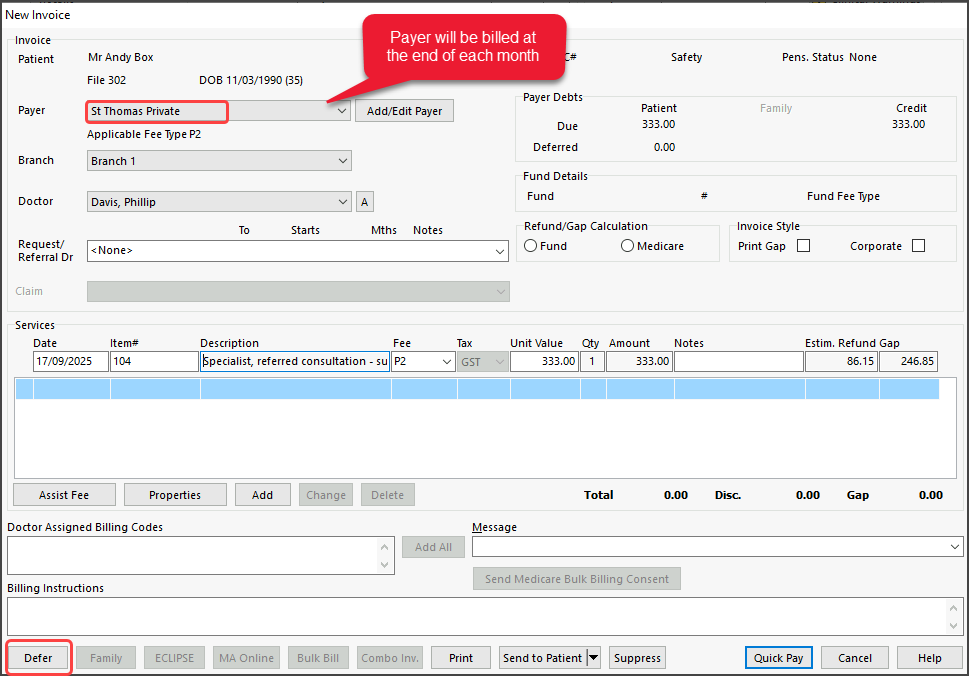 The invoice will show in the patient's account enquiry with a D for deferred.
You can use the Payer field and Display Invoices > Deferred to display deferred invoices by payer.
Managing deferred invoices
At the end of the month or appropriate period, use Zedmed's Print Deferred Bills feature to process the deferred invoices, in two steps.
- Check all monthly payers' invoices were deferred.
- Print the invoices and convert them to debts.
You can perform these steps for all payers, or separately for patients and third parties. Once a deferred invoice is converted to a debt, it will appear as an outstanding amount on financial reports and Zedmed will recalculate the patient/payer balances in a patient's account enquiry. Once this has been done, it cannot be reversed.
To access the Print Deferred Bills feature:
- Select the Management tab
- Select Debtors > Print Deferred Bills.
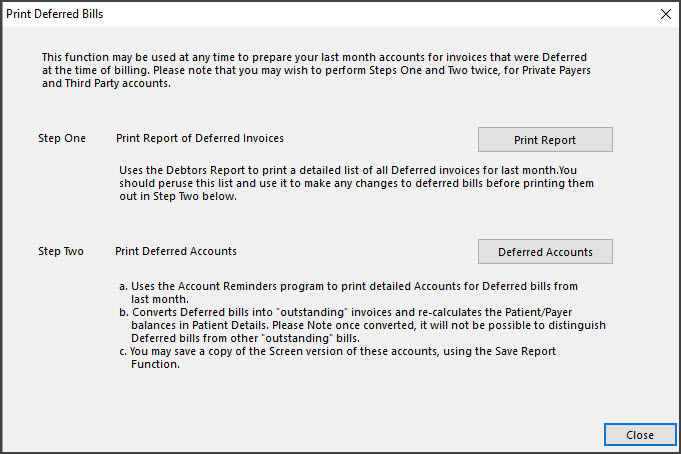
Step 1 - Checking the invoices
In this step, you will compare a deferred invoices report to the Appointment Report or Attendances Report (recommended as it's a single page) and check each payer's invoices have been created and deferred.
To check the deferred invoices:
- Open Print Deferred Bills.
- Select Print Report.
This will open the Debtor Report for deferred invoices. The default date range backdate to the end of the previous month.
You can filter by payer, and run the report for private patient and third-party payers separately.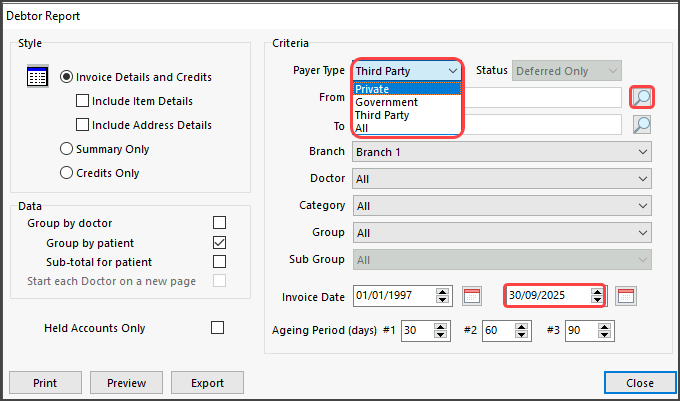
- Review the report, you may choose to check it against the Attendance Report.
Check that the payer's invoices for the month have been created and deferred.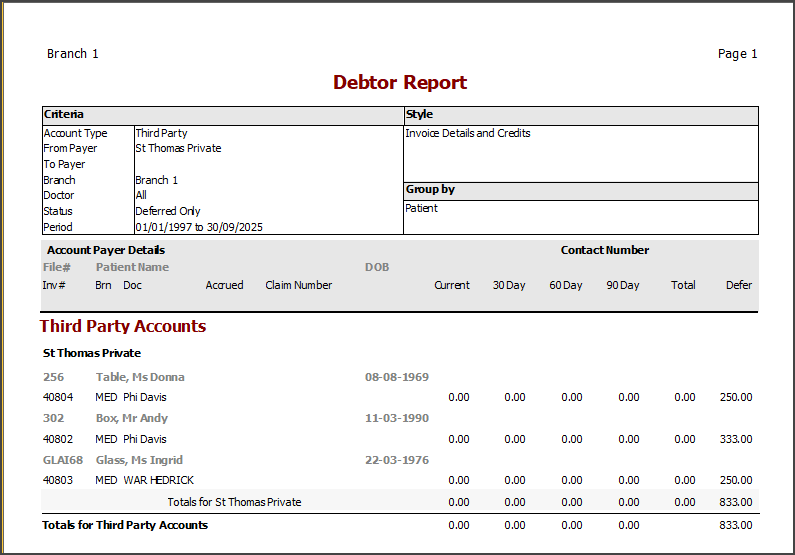 The report's total will still show a deferred amount, not an outstanding debt.
- Create and defer any missing invoices.
- Close the report when you have finished your review.
Step 2 - billing the payer
You can now print out or save the invoices. Doing this will convert the deferred invoices into outstanding amounts (debt). Once the invoices have been converted, they cannot be distinguished from other invoices.
To process the invoices:
- Open Print Deferred Bills.
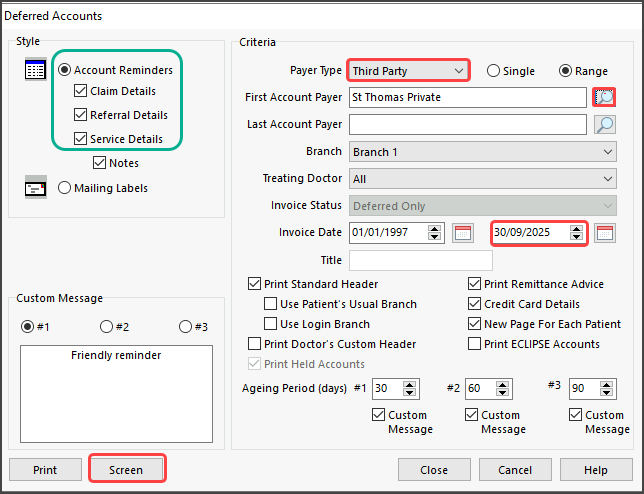
- Select Deferred Accounts.
This will open the Deferred Accounts screen. The default date range will go up to the end of the previous month.
The report is run for either private payers or third-party payers.
By default:- Private will print all visits for the patient that month.
- Third Party will print all deferred invoices on the same invoice.
- Review all available settings carefully.
- Select Screen.
 The invoices will open. The example below is for a third party and shows the first of 3 invoices for that month.
 - Use the menu to print out the invoices or save them in PDF format.
- Important: Check that you have successfully printed or saved all the required invoices.
Once you have closed the Deferred invoices, you can not access them again.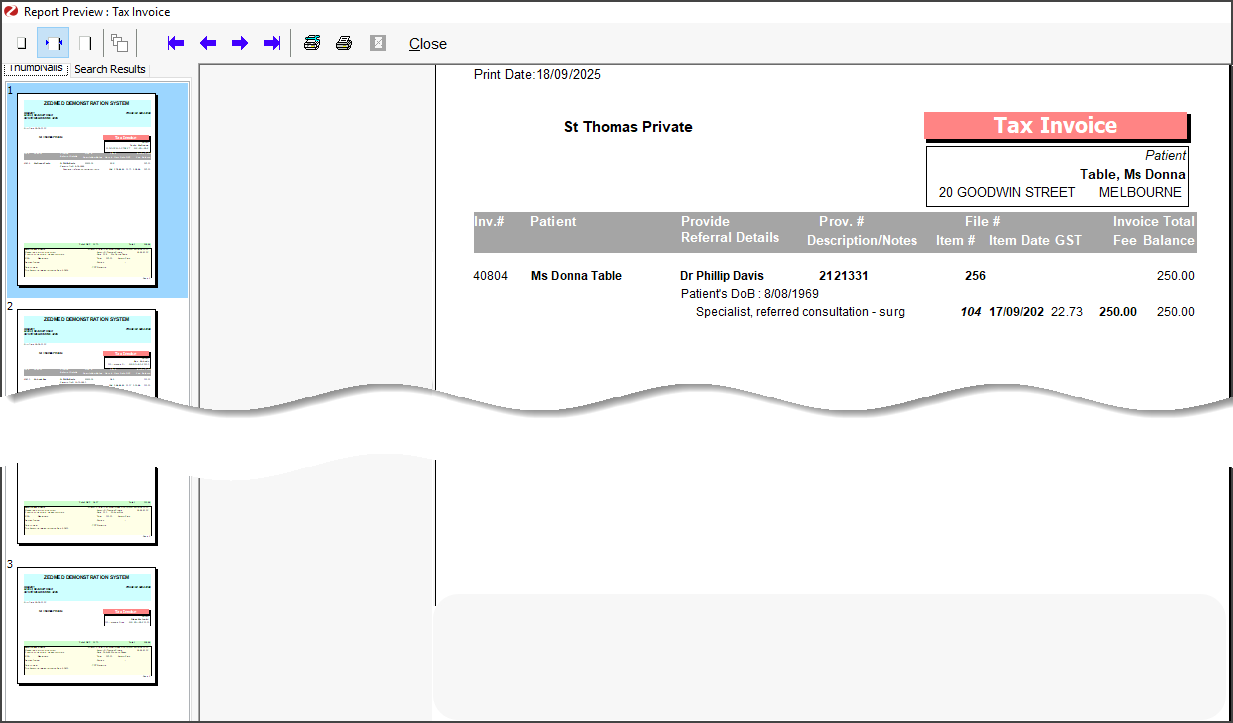
- Select Close.
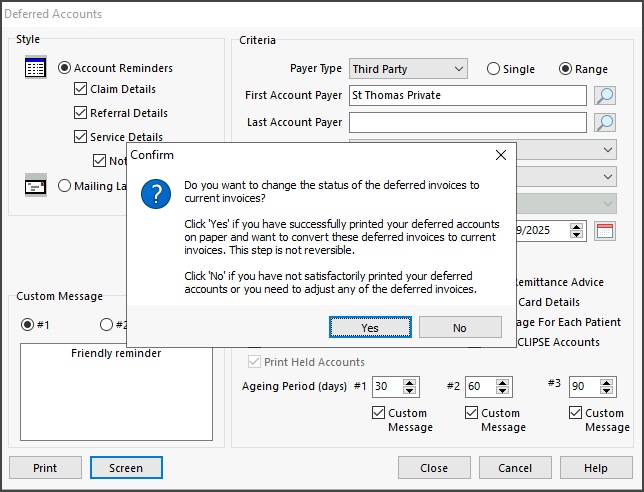
- Review and confirm the dialog.
When you select Yes, the invoices will be converted into current invoices with an amount owing (debt).
This cannot be reversed. - Select OK on the information dialog.
- Select Close on the Deferred Accounts screen.
- The invoices can now be distributed by post, fax or email.
The patient's account enquiry will display the invoice as an amount outstanding.
Receipting an invoice paid at a later date.
To receipt the invoice:
- Open the patient’s details screen.
- Select Acc Enquiry.
- Select the Payer from the drop-down.
- Select the relevant invoice.
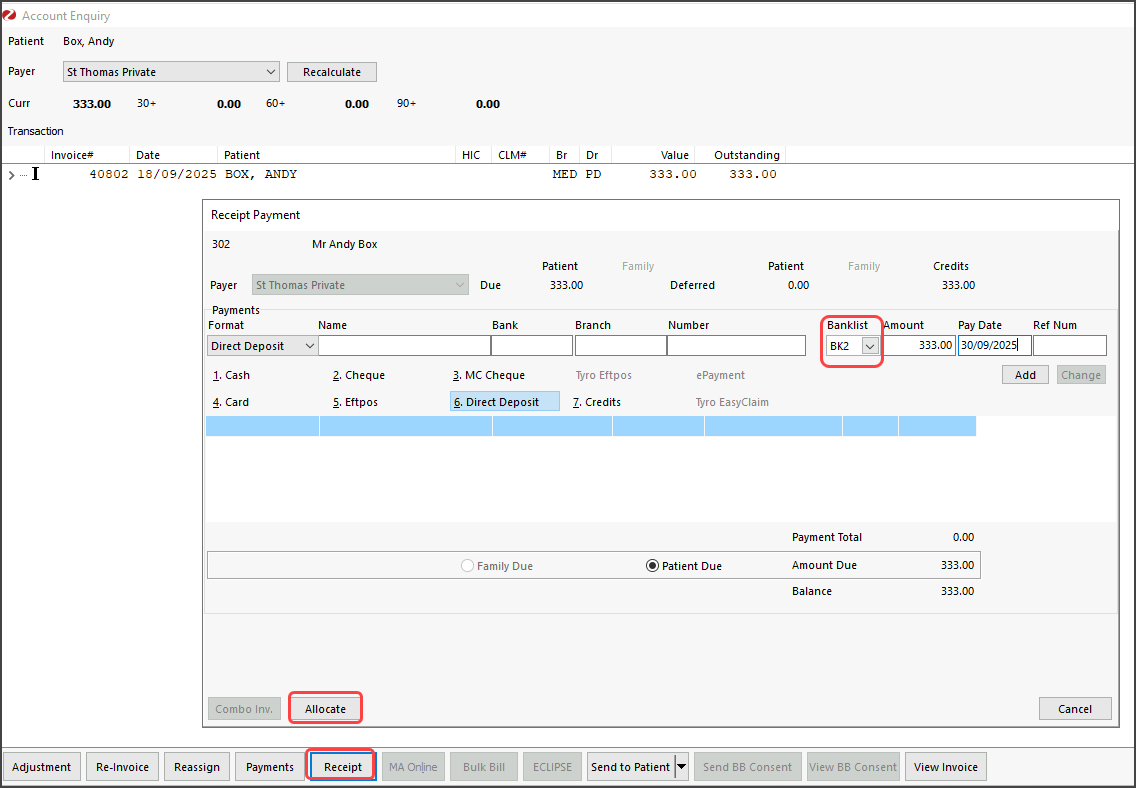
- Select the Receipt button at the bottom.
This will open the Receipt Payment screen. - Select the payment method used
- Check the correct Banklist is selected for the doctor.
- Select Allocate.
This will return you to the Acc Enquiry screen. - Select the invoice
- Select Fully Receipt.
- Select Close.
- Respond to the Print dialog to print or close.

 The invoice will show in the patient's account enquiry with a D for deferred.


 The report's total will still show a deferred amount, not an outstanding debt.
 The invoices will open. The example below is for a third party and shows the first of 3 invoices for that month.


