Secure Send uses email or ZedSMS to send invoices, referrals and documents to a patient, a next-of-kin or third-party Account Payer using a link to a secure download page.
To request access, submit a Secure Send request form.
Practice preparations
Considerations
- Secure Send is a free feature. However, the SMS option requires ZedSMS and uses ZedSMS credits.
- The email and SMS sent to the patient will show the practice name but not the practice email or phone number.
- Documents will be available in the Secure Send portal for seven days.
- If multiple documents are sent within 15 minutes, one notification will be received to give access to all documents.
- Printing a document sent to a mobile phone may pose problems for some patients.
- We also recommend the Secure Send User guide and the Secure Send FAQ.
Security
- Documents are securely transmitted via HTTPS and stored in encrypted, Australia-based Amazon (AWS S3) cloud storage. They are automatically deleted seven days after being sent.
- To access the document, the patient receives a pin using the same email or mobile number that sent the document link.
Requirements
- Patient: The patient (or payer) should have their email address and mobile number in their patient record for the Secure Send delivery fields. The patient name and email/SMS will be used if there is no Payer in the patient's record.
- Payer: The Account Payer (patient or NOK) being sent the message should be set up as a payer in the patient's record. The default payer can be different, but the patient/NOK Account Payer must also be selectable.
- ZedSMS: SMS delivery requires ZedSMS and uses SMS credits. Without ZedSMS, Secure Send can be delivered using email.
Popular scenarios
- Telehealth and video consultations.
- In-patient consultations where electronic pathology and radiology referrals are preferred.
- In-patient consultations where invoices and documents need to be sent electronically to the patient.
Setting up Secure Send
Step 1 - Submit a Secure Send request form.
Zedmed will set up a branded download portal for your patients and will need access to your server to complete the setup. Please check that you are using Zedmed v36.5 or later before submitting the request.
Step 2 - Implement electronic signatures
Because your practitioners will send referrals and letters electronically, they will electronic signatures in their Doctors Details. If they do not, their letters and referrals will be sent without signatures. Follow the Electronic signature guide to create and add the signatures.
Step 3 - Set up radiology and pathology templates (Address Book)
To use Secure Send for pathology and radiology referrals, you must send the referral to an addressee who is set up with the pathology and radiology templates.
Why are these templates needed?
To use Secure Send for laboratory referrals, Zedmed's 'PathologyZedmedRequestForm' or 'RadiologyZedmedRequestForm' templates must be used. This is because lab-specific templates require the provider's physical paper. The Zedmed templates include all the information needed for a referral and use a merge field to apply the practitioner's electronic signature.
Select this link to view the templates, which are added to the Address Book as shown here.
How do I add this addressee?
The Address Book guide has a dedicated section for adding a Secure Send Addressee.
Summary of steps:
- Open the Clinical Address Book.
- Set Type of Contact to Pathology or Radiology Laboratory.
- Create a pathology addressee and add the 'PathologyZedmedRequestForm' template
- Create a radiology addressee and add the 'RadiologyZedmedRequestForm' template.
See the screenshot below for an example.

Step 4 - Set up your letter templates
A practitioner's signature will be added to any letter containing the merge field: Treating doctor > Signature Image.
The practitioner can delete the 'signature image' merge field if they want to print and manually sign.
- Review your letters and identify the ones that need to support electronic signatures for Secure Send.
- If required, create new letter templates for electronic signatures.
- Add the merge field Treating doctor's name and 'Signature Image' to all letter templates that need to support Secure Send.

Step 5 - Set up a call with Zedmed
Once your Secure Send request has been processed, Zedmed will contact you to set it up on your server.
On this call, the integration will be enabled in the Practice Integrations screen.

Step 5 - Explain Secure Send to your users
Advise your practitioners how to use Secure Send for referrals and letters.
Zedmed has a Secure Send guide and there is a dedicated section in each relevant guide.
Key information:
- For a radiology or pathology referral
Use the generic addressee with the generic template.
Use the Secure Send button on the Pathology or Radiology screen. To learn more, see the:
- Sending the referral section Option 2 - Secure Send of the Radiology referral guide.
- Sending the referral section Option 2 - Secure Send of the Pathology referral guide.
- For a referral letter or clinical letter
Use the Send to Patient section of the distribute screen.
Use a letter template with an electronic signature.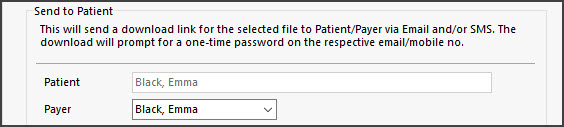 To learn more, see the:
- Sending a Referral Letter section of the Write a referral letter guide,
- Secure Send the letter section of the Clinical letter guide.
- For Reception
Use to send a copy of an invoice from Invoice Details - Send to Patient > Send Secure Link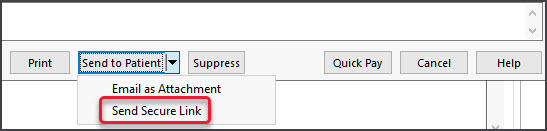
- For Batch Letters
Use for an individual patient's letter by right-clicking the patient and selecting Distribute.- To learn more, see the Using Secure Send guide.
 To learn more, see the:
 To learn more, see the:
Monitoring Secure Send
Use Message Manager to view Secure Send messages for all patients with the Billing and Clinical Document filters.

Use the Messages tab on the patient's record to view Secure Send messages for a specific patient. Secure Send messages will have the description "File Delivery messages". You can see the address or mobile number the document was sent to and what the document was.
