Create a schedule to help manage what a practitioner or resource's time is used for. The schedule will be assigned an Activity Type, which determines the types of appointments that can be booked in that schedule's time slots.
Overview
A practitioner's Schedule in the Appointment Book is allocated an Activity Type with a colour, for example, blue for Consultation. This guides staff what Appointment Types they should book in the schedule. Each appointment type has a colour that will sit on top of the Activity Type in the Appointment Book.
Example: A practice has a blue Activity Type - Consultation used for the Appointment Types: Long Consultation-30min, Std Consultation-15min and New Patient-30min. Reception staff looks for the available blue slots to make the appointment.

Create a schedule
To create a schedule:
- Go to Zedmed's Management tab.
- Select Practice Setup then Appointments > Schedules.
The Set Schedules for Doctor or Resource screen will open. - Select the Doctor or Resource you need to create a schedule for.
The Schedules section shows all schedules currently set for the doctor. The Sessions section shows the sessions that occur each week for the selected schedule. - Select Add.
This will clear the fields that are used to create a new schedule. - In the Start Date field, enter a date using the dd/mm/yyyy format and press Tab.
- If this is an ongoing schedule, leave the End Date blank. If there is an End Date, enter one.
- Select a cycle from the Cycle(Days) drop-down - this is how long the schedule runs before repeating.
- Select the Branch
- Select Graphic Display.
 This will open the Doctor Schedule screen (below).
 - The Display slot size field at the top right is to display the time increments only on this screen and has no impact on the slot size of the schedule that you are creating.
- Double-click the time slot where the schedule will start.
The Daily Schedule will open. - Set the Start Time and End Time and Slot Length.
- Select an Activity Type.
To learn more, see the Create an Activity Type article.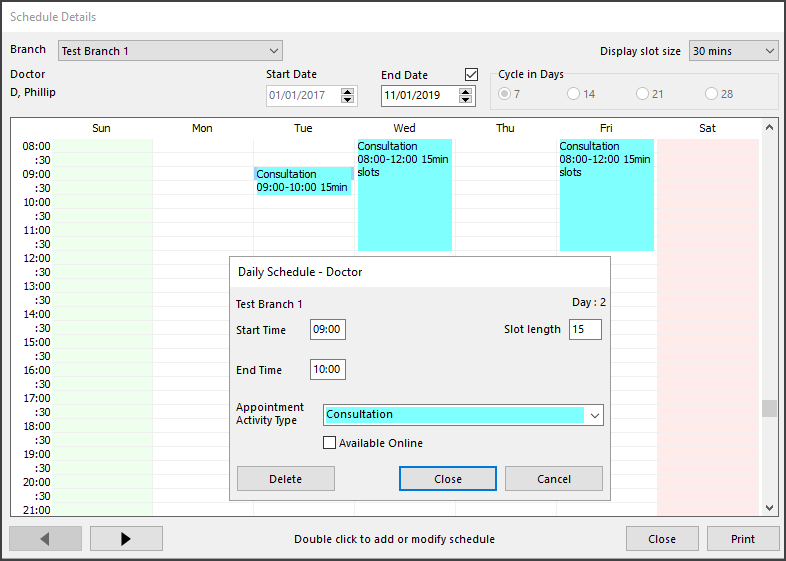
- Repeat this process to add more schedules as required.
- Select Close to save and exit
- Select Check for Conflicts
If there are any conflicts, you will need to change one of the conflicting schedules so that they do not overlap.
See the Resolve Schedule conflicts section below to learn more. - Close to save and exit the Set Schedules screen.
- Configure Online Appointments
If the practice is using Zedmed Online Appointments, you will now select each session in each schedule and tick Available Online as required. Follow the steps in the Set up Online Appointments guide to complete these steps.
 This will open the Doctor Schedule screen (below).
Resolving Schedule conflicts
If a practitioner or resource has a schedule conflict, it must be resolved before the schedule set can be saved. Conflicts often occur when changes are made and those conflicts will be displayed on the right pane with a red border. Requires Zedmed v38.
To resolve a conflict:
- Review the conflict description/s and identify the conflicts. A description of each conflict will be provided with the data and times. Select each branch and review the session times for the day of the conflict.
- Remove or modify one or more conflicting sessions so there is no overlap.
- Select Check for Conflicts.
- If there are still conflicts repeat the steps above.
- If there are no conflicts, select Close to save the schedule set.
Important: No changes to the schedules or sessions will be saved until you select Close.
