
Practitioners can add messages that will appear for all bookings, and the practice can add messages for specific Appointment Types, which will override any messages defined by a practitioner.
Practice messages for Appointment Types
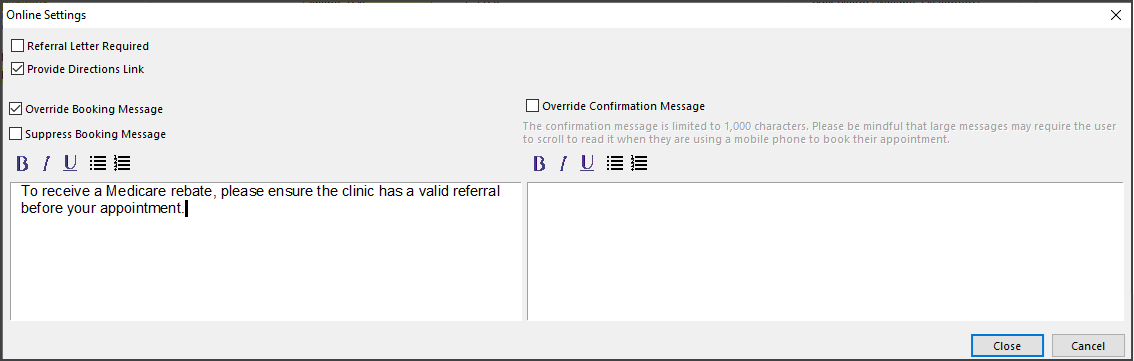
To add a message to appear for all practice bookings for a specific Appointment Type:
- Open Appointment Type Settings.
- Select the Online Settings button.
- Tick Override Booking Message.
- Type the text into the field provided.
- Select Close to save.
Practitioner messages for scheduled sessions
Create a set of messages that can be enabled on a per-practitioner-session basis.
Considerations:
- The practice should create a standard set of messages.
- All messages are saved and can be used by other doctors.
- If you select multiple messages, they will be appended to the same message dialog.
- There is no character limit, but too much text can push the message beyond a phone's screen size.
- Selectable hyperlinks are not supported.
Adding Messages:
- Select Practice Setup > Appointment > Schedules.
- Select a doctor.
- Select the session to add the message to.
- Select the Messages button to open the Schedule Messages screen.
- Select the Add button to open the Editor (or Edit to update an existing message).
- Type the message text.
- Select Close to save the message.
You now have a message that can be applied to any doctor's schedule. - Tick the box next to the message to apply it to the selected schedule.
- To add the message to other schedules:
- Select the schedule.
- Select the Message button.
- Tick the box next to the message.
- Repeat for each doctor.
The message will display when a patient selects an appointment during that session.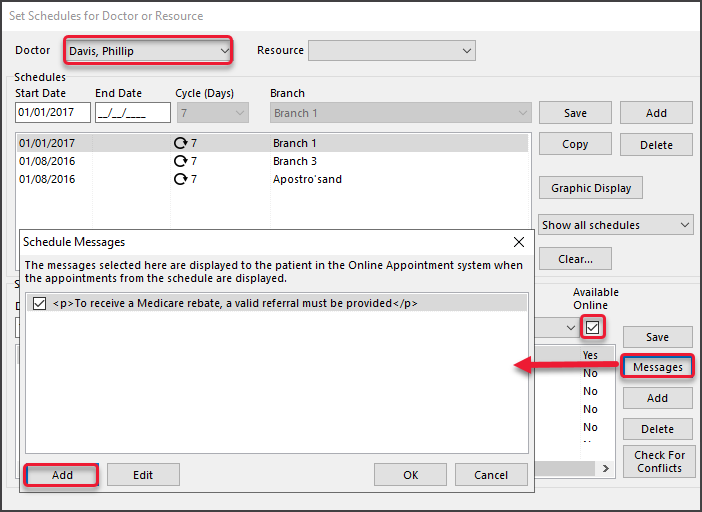
Patent Responses
- Patients must confirm they understand or accept the message.
- Selecting No, Cancel takes the patient to the previous step. Selecting Yes, Continue will create the appointment
